Showing posts with label cupcakes. Show all posts

Monday, October 1, 2012

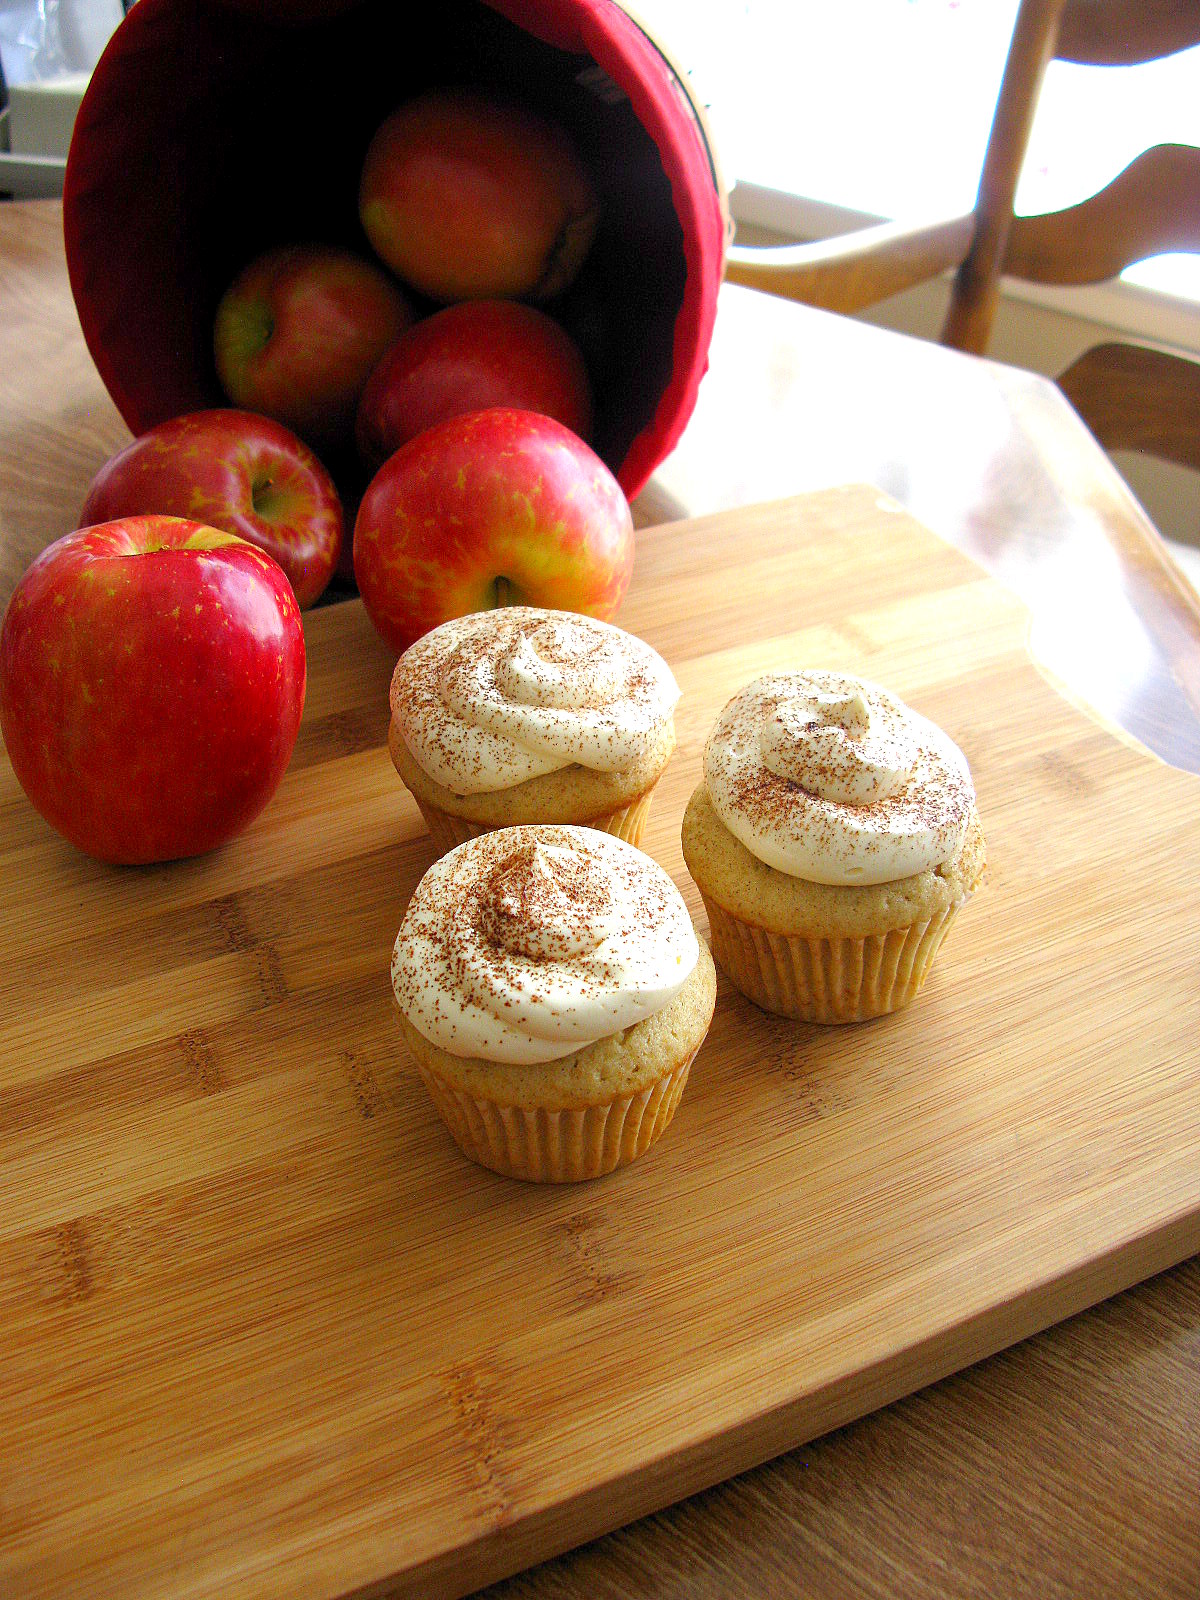
Apple Cider Cupcakes


Breaking news!!! I'm still alive! It has literally been so long since I've baked and blogged that I've forgotten how to do everything. Seriously. When I went to edit my photos, half of them were out of focus because I've apparently forgotten how to use my camera...

Here is a quick recap of the past few months: I've since moved to San Francisco and have already finished my first quarter at FIDM and I absolutely loved it. It reminded me how much I love learning, how much I love shopping, and how much I enjoy procrastinating (in the beginning at least). And although I don't want my break to end, I'm looking forward to starting the next quarter and it feels pretty darn good!

So... I had originally planned to bake off some alcoholic cupcakes first, but when I found out my nephews and niece (who are ages 2, 4, and 5) would be visiting, I decided to change it to a more kid-friendly cupcake... Anyway, for the past month, I've been looking forward to the arrival of autumn and these encompass the season pretty well, if I do say so myself. The cake itself has the sweet cinnamon and apple flavors you'd find in hot apple cider, and the caramel buttercream adds just the right amount of creamy richness. And bonus: your whole house smells like Christmas when you're baking these!

The Ingredients (makes about 2 dozen):
For the cupcakes:
-3 1/2 cups flour
-2 tsp baking powder
-1 tsp ground cinnamon
-1/2 tsp salt

-1 cup unsalted butter, room temperature
-2 cups sugar
-2 tbsp vegetable oil
-4 eggs
-1 tsp vanilla extract

-1 cup unfiltered apple cider

For the caramel sauce (from Ina Garten's recipe; optional, you can use store bought):
-recipe can be found here

For the frosting:
-1 cup unsalted butter, softened
-1 cup vegetable shortening
-1 1/2 cups caramel sauce, or to taste

The Directions:
Tip: If you choose to make your own caramel sauce, be sure to make it far enough ahead of time to allow it to cool, which may take up to 4 hours. 
1. Preheat the oven to 350 degrees Fahrenheit and line your cupcake pan.
2. Sift the flour, baking powder, cinnamon and salt together and set aside.
3. Beat the butter and sugar together until combined.
4. Add eggs, vanilla and oil one at a time and mix until combined.
5. Stir in the cider.
6. Slowly add the dry mixture to the wet, mixing until just combined.
7. Bake for 12 to 15 minutes or until a toothpick in the center comes out clean. Allow to cool completely.
8. Cream the butter and shortening together until combined.
9. Slowly add the caramel sauce, making sure to scrape the bottom of the bowl to keep anything from settling.
10. Consume and enjoy!

Tuesday, February 21, 2012

The Hostess With The Mostest

Oh boy, busy busy month February is. I think every weekend this month, I've been busy with something. Today is the first day I've had some down time in awhile so I'm trying to use this as an opportunity to get some much needed work done, including this blog.


I do have some news, but I can't decide if it's good or bad yet. I recently met with an admissions adviser at the Fashion Institute of Design and Merchandising (FIDM) in San Francisco about possibly enrolling in their merchandise marketing program. I know, crazy, huh? And for those who have known me for at least the past few years, I'm just as shocked as you are. The adviser was very helpful and very well informed, but with all the information to digest, I left the building semi-nauseated by it all. Long story short, I think the program sounds excellent and the support and networking the school offers to their students is very desirable but I'll have to think about each pro and con thoroughly. And on top of all of that, if I want to pay the current tuition before the increase, I have to be accepted into the school by May 1st. No pressure, right?


Anyway... can you guess where I got the inspiration for these cupcakes? This might sound cheesy (but admittedly, probably not more than the title for this post), but I got the idea for these after I opened up my pantry and saw a box of the familiar chocolate cupcakes with the white squiggle on top and the overly sweet cream centers. And, fun fact: the "cream" used to fill the cupcakes is actually made with Crisco, not real cream. Yum. My version of the famous sweet treat is filled with vanilla mousse and raspberry preserves. A pretty tasty combination when combined with the rich chocolate cake and chocolate ganache on top, if I do say so myself. 


The Ingredients (makes about 2 dozen):
For the cupcakes:
-recipe can be found here
For the filling:
-2 tsp vanilla extract
-2/3 cup sugar
-2 egg whites
-1 cup heavy cream
- raspberry preserves
For the frosting:
-3 cups bittersweet chocolate chips
-1 cup heavy cream
-1 1/2 tbsp corn starch


The Directions:
1. Start with the filling first. Whip the heavy cream, vanilla and half of the sugar until soft peaks form. Set aside.
2. Beat the egg whites until foamy. Then add the rest of the sugar and beat until stiff peaks form.
3. Carefully fold the egg mixture into the whipped cream until combined. Refrigerate for at least 6 hours to allow the mousse to firm up (I made this the night before making the cupcakes).
4. Bake the cupcakes as directed.
5. Once the cupcakes are cool, core out the middle, being careful to keep the cores intact as you will need them to close up the hole later. Set aside.
6. Put a layer of raspberry preserves into each cupcake and follow with a spoonful of vanilla mousse. Replace the tops of the cupcakes to prepare for the ganache frosting.
7. Dissolve the corn starch into the heavy cream first to avoid clumping. Then, in a double boiler, melt the chocolate chips and heavy cream together and stir until smooth.
8. Apply a layer of the ganache on top of each cupcake and allow to cool completely before serving or decorating.
9. Consume and enjoy!

Sunday, January 8, 2012

Rainbow Cupcakes


A close friend of mine has been requesting some rainbow cupcakes for well over a year now, so I finally gave in and made them for her. As pretty as these turned out though, I'll have to admit that I don't plan on doing these again for quite some time, as it is very time consuming. And if you're semi-OCD like me, it could require a lot of patience as well as a steady hand. I mixed up and dyed the batter in no time, but filling the cups and spreading out all the colors took days. Okay, not really, more like 5 to 15 minutes per color. But because my batter is a little more thick, it took a little more elbow grease and careful spoon maneuvering to get the colors to spread out.


If you're not OCD like me though, you can always just spoon the batter in without spreading it out first and they'll still come out nicely!


Happy 2012!

The Ingredients (makes about 2 dozen): 
For the cupcakes:
-3 1/2 cups flour
-1 tbsp baking powder
-1/2 tsp salt

-1 cup unsalted butter, softened
-2 cups sugar
-2 tbsp vegetable oil
-4 eggs
-1 tsp vanilla extract
-1 cup milk

-assorted food coloring (I used gel)
For the frosting:
-1 cup unsalted butter, softened
-1 cup vegetable shortening
-1 1/2 cups powdered sugar, or to taste
-1 tsp vanilla extract


The Directions:
1. Preheat your oven to 350 degrees Fahrenheit and line your cupcake pan(s).
2. Whisk together flour, baking powder and salt in a large bowl and set aside.
3. In your mixing bowl, cream the butter and sugar until light and fluffy. Then add eggs one at a time, mixing until combined. Then add in the vanilla and oil, mixing well.
4. Add 1/3 of the dry ingredients to the wet, mix until combined, then add 1/2 the milk. Repeat until you run out of both. Make sure to scrape the bottom of the mixing bowl between each addition, especially after the dry, to ensure everything is mixed in.
5. Divide the batter into 6 bowls/cups and add the food coloring until desired color is reached. I divided the batter evenly, but upon filling the cupcake liners, I realized I should've divided it so that my bottom color would have the least amount of batter and my top color would have the most since I wanted to spread out each color to the edges of the liners.
I reused some plastic cups from a coffee shop I frequent so I didn't have to worry about the dyes staining my dishes
6. Fill cupcake papers and bake for 15 to 18 minutes or until a toothpick comes out clean, rotating the pan halfway through to ensure even baking.
7. Cream the butter and shortening together. Then slowly add the sugar and follow with the extract. This can also be dyed with the food colors, if desired.
8. Consume and enjoy!

Saturday, December 24, 2011

December's Cupcake Of The Month: Dark Chocolate and Peppermint

I hope you are all having a lovely December so far. Earlier this month, I was knee deep in work, tutoring, and finals, so of course, I welcomed my break with open arms. And even though I can't say that I've been particularly productive this break (what with my long to-do list of reading two book series, going back to the gym, and other miscellaneous tasks that I've been putting off), I have been enjoying the time I've spent with my family and friends. There's just something about the simple things in life like staying in for the night and watching a movie with my brothers or spending hours catching up with a friend over coffee that makes me so grateful for what I have. It's actually making me a little teary-eyed right now just thinking about it. But anyway... 


On a less serious note, another thing I'm really grateful for is chocolate. Especially when it's paired with almonds or mint. So I decided that, as a birthday present to myself, I'd center this month's cupcakes around chocolate and peppermint! I used the same recipe for the cupcakes as my chocolate and Chambord recipe and for the filling and frosting, I made a super simple whipped cream, flavored with peppermint extract and candies. I hope you enjoy this recipe! Cheers and happy holidays!


The Ingredients (makes about 2 dozen):
For the cupcakes:
-recipe can be found here
For the filling and frosting:
-2 cups heavy cream
-4 tbsp powdered sugar, or to taste
-2 tbsp peppermint extract, or to taste
-1/2 cup finely ground peppermint candies


The Directions:
1. Bake cupcakes as directed.
2. When cupcakes are cool, cut out the center of each cupcake.
3. Whip the cream until soft peaks form.
4. Slowly add the sugar, and then the extract and whip until firm peaks form.
5. Gently fold in the candies and then fill and frost cupcakes.
6. Consume and enjoy!

Saturday, November 19, 2011

November's Cupcake Of The Month: Super Chocolate-y Vegan Cupcakes

Oi, almost another month gone already. All this time flying by has made me realize just how much I procrastinate. Seriously. My original plans for November were to get my hair cut, dye my hair again, bake two goods for National Vegan Month, catch up on reading, and respond to an invitation to meet up with a friend. So far, I've baked these cupcakes and kind of responded to the invitation. And by kind of, I mean, I told him the days I would be available in hopes that he would set a date because I'm indecisive as hell, but instead he said "whenever" is fine with him... Well, guess what, you can't spell "whenever" without "never" so I guess we can't be friends. Just kidding, I'll see him in a couple of weeks. 


But anyway, with Thanksgiving less than a week away, the holiday season is upon us! And for all of you Game of Thrones fans out there, winter is coming! So make sure to come back soon to check for more holiday-inspired goodies. And if you love the combination of pumpkin and chocolate, be sure to visit before Thanksgiving!


Now, finally, on to the cupcakes. You would never be able to guess that they're vegan just by tasting them. They're super moist and the super easy frosting makes them the perfect little animal product-free treat. Since I don't have a vegan recipe of my own, I borrowed this one from "Vegan Cupcakes Take Over The World," written by two wonderful vegan bakers. And if cupcakes aren't your thing, they have other vegan cookbooks as well, including "Vegan Cookies Invade Your Cookie Jar" and "Vegan Pie In The Sky". Hope you enjoy these as much as I did! 


The Ingredients (makes 1 dozen):
For the cupcakes (from Vegan Cupcakes Take Over The World):
-1 cup plain soy milk
-1 tsp apple cider vinegar
-1/2 cup unbleached cane sugar
-1/3 cup canola oil
-1 1/2 tsp vanilla extract
-1 cup all purpose flour
-1/3 cup unsweetened cocoa powder
-3/4 tsp baking soda
-1/2 tsp baking powder
-a pinch of salt
For the frosting:
-1/4 cup unbleached cane sugar
-1/4 cup unsweetened cocoa powder
-about 1/3 cup warm water


The Directions:
1. Preheat your oven to 350 degrees Fahrenheit and line your cupcake pan.
2. Whisk the soy milk and vinegar in a large bowl and set aside to allow it to curdle.
3. In a separate bowl, sift together the flour, cocoa, baking soda, baking powder and salt.
4. Add the sugar, oil and vanilla to the soy milk and beat until foamy. Then add the dry ingredients in increments, mixing until smooth and combined and scraping the bowl between each addition.
5. Fill cupcake cups and bake for 18 to 20 minutes, or until a toothpick in the center comes out clean. Allow to cool completely before frosting.
6. Combine the sugar and cocoa powder in a bowl and whisk in a tablespoon of water at a time until you reach your desired consistency. Stir until smooth. If you're having trouble getting the sugar to dissolve completely, you can stir the mixture over a pot of simmering water.
7. Frost your cupcakes.
8. Consume and enjoy!
Jordan, my assistant for the day, picking out his reward

Monday, October 10, 2011

October's Cupcake Of The Month: Pumpkin Cupcakes

It's finally starting to feel like autumn now! Well, at least where I live. Last week, we had our first rain of the season, and after so many months of 90+ temperatures, it was really nice to be able to put on a jacket and a scarf. I didn't really appreciate that it rained two days after I washed my car though... but that always happens to me, so I don't really know why I'm surprised anymore.

In other news, I start my volunteer work with Reading Partners tomorrow! It's a program in California, New York, and Washington, D.C. that offers free tutoring to elementary school children who are behind in reading or are reading below grade level. I'm going to be tutoring twice a week, Mondays and Wednesdays, and I'm so excited! I have two students and I'm going to meet both of them this week. I'll only be spending an hour a day though so that means I'll only see each student once a week. But hopefully, my time spent with them will make a small difference. 

Anyway...

These cupcakes came out way better than I expected. They were moist and soft, even after spending a night in the fridge! And they smelled heavenly while they were baking. The cream cheese frosting that I made to go with it paired perfectly too. Sweet cinnamon with a slight tang from the cream cheese, and then this rich spicy goodness from the cake. Mmm... autumn at its finest.

The Ingredients (makes about 2 dozen):
For the cupcakes:
-2 cups flour
-3 tsp baking powder
-2 tsp baking soda
-1/4 tsp salt
-2 tsp pumpkin pie spice

-1 tsp ground cinnamon
-2 cups sugar
-1 1/4 cups plus 1 tbsp vegetable oil
-1 tsp vanilla extract
-2 cups pumpkin puree
-4 eggs
For the frosting:
-16 oz cream cheese, softened
-1/2 cup unsalted butter, softened
-2 cups powdered sugar, or to taste, sifted
-1 tsp vanilla extract
-1 tsp ground cinnamon

The Directions:
1. Preheat the oven to 350 degrees Fahrenheit and line your muffin pan.
2. Sift together the flour, powder, soda, salt, pumpkin spice, and cinnamon and set aside.
3. Combine the oil and sugar in your mixing bowl. Blend in the vanilla and pumpkin. Then the eggs one at a time.
4. Add in the dry ingredients in increments, thoroughly mixing and scraping the bowl between each addition. Fill cupcake liners about 2/3 full and bake for 18 to 20 minutes, or until a toothpick in the center comes out clean. Rotate the pans halfway through to ensure even baking. Allow to cool completely before frosting.
5. Cream the butter and cream cheese until smooth and combined. Mix in the vanilla and then slowly, about a tablespoon at a time, add in the sugar. Then add the cinnamon.
6. Frost cupcakes and garnish.
7. Consume and enjoy!

Wednesday, September 28, 2011

September's Cupcake Of The Month: cà phê đá (Vietnamese Coffee)

I can't believe it's the end of September already! It's crazy how fast time is flying by. Since my last recipe post in August, I've been busier than ever with school, babysitting and trying to keep up a social life so it was nice to finally be able to take some time out this weekend and not think about anything else but the recipe at hand. 


Now, it's been quite a while since I've attended school full time, so this fall was definitely a big change for me. At first, it was a little difficult keeping my dates for appointments and such in order, especially since I have the worst habit of never writing anything down or forgetting to write things down by the time I have a chance. I started mixing up dates or forgetting certain details, which at the end of August, completely threw me for a loop.


Someone had ordered a dozen and a half cupcakes from me for the first weekend of September but somehow when I went back to write it in my calendar, I wrote them down for the last weekend of August! And I didn't realize my mistake until I was standing there in my kitchen, with all the cupcakes ready to be frosted. Needless to say, I was pretty mad at myself. Mad that I had written down the wrong date, mad that I had gone so far into the cupcake-making process before realizing my mistake, and mad that I now had two dozen cupcakes to find homes for (which is actually harder than you'd think). Luckily, I know some of the most awesome people in the world who graciously ate multiple cupcakes just for me. 


Now to find people to eat these...


Overall, these cupcakes weren't bad, but they could have been better. As you could probably tell from the title of this recipe, these cupcakes were inspired by Vietnamese coffee. Unfortunately, they lacked that strong, distinct coffee flavor. That was mostly my fault, though, because I was lazy and used normal coffee instead of espresso or Cafe du Monde coffee. But if you don't have either of those on hand, I'd strongly recommend making some of the coffee syrup from my tiramisu cupcakes and doing the same thing I did in that recipe. The cupcakes also came out really fluffy, which I like, but they were also dry, so I added a tbsp of oil to the recipe below.


And again, I have no process pictures. I have this other bad habit of getting bored very easily. After about the hundredth time of taking pictures of the same thing (i.e. the batter making process), it starts to become repetitive, and not to mention, very time consuming. So I've decided that the only process pictures I will be taking now will be of techniques or steps I've never mentioned before, unless I have extra time and the steps aren't time sensitive.


Anyway, I hope you enjoy this recipe and of course, if there are any questions about this or any other recipe, past, present, or future, feel free to email me! I will be more than happy to answer them!


But seriously, the next time you're making Vietnamese coffee (or even just normal coffee) at home, try Cafe du Monde. You won't be disappointed.

The Ingredients (makes about one dozen):
For the cupcakes:
-1/2 cup butter, softened
-3/4 cup sugar
-1 1/2 cup flour
-1 1/2 tsp baking powder
-1/8 tsp salt

-3 eggs
-1 tbsp vegetable oil
-3/4 tsp vanilla
-3/4 cup espresso or very, very, very strong coffee

For the frosting:
-1/2 cup unsalted butter, softened
-1/2 cup vegetable shortening
-1/4 cup sweetened condensed milk, or to taste
-2 tsp vanilla
-pinch of salt


The Directions:
1. Preheat oven to 350 degrees Fahrenheit and line your muffin pan.
2. Cream the butter and sugar until light and fluffy.
3. Sift together the flour, salt and baking powder in a separate bowl and set aside.
4. Add eggs, vanilla and oil one at a time, mixing thoroughly between each addition.
5. Add 1/3 of the dry to the wet, then 1/2 the espresso and alternate until you run out of both. Make sure to mix thoroughly and scrape the bowl, especially after adding the dry ingredients.
6. Once batter is smooth, bake for about 15 minutes or until a toothpick in the center comes out clean. Allow to cool completely before frosting.
7. Cream the butter and shortening until well combined.
8. Slowly add in the condensed milk, scraping the bottom of the bowl to make sure nothing settles at the bottom.
9. Once the buttercream is sweet enough to your tastes, stir in the vanilla and salt.
10. Consume and enjoy!

Monday, August 8, 2011

August's Cupcake Of The Month: S'mores

Happy early National S'mores Day! Yup, you read right. There's a National S'mores Day and it falls on August 10th.


To celebrate this classic campfire treat, these cupcakes were made with graham cracker crumbs, filled with rich chocolate ganache and then topped with a marshmallow-type frosting. And because I wanted to make the cake even more graham cracker-y, I substituted some of the sugar with honey as well. I'm very happy with the results, even though my cake didn't come out tasting exactly like the crackers. But that was mostly due to my laziness. My house already had a box of graham crackers but they had a dusting of cinnamon so instead of going out and purchasing a new box of crackers that I knew I probably won't eat, I used what I had on hand instead. My friends told me the flavor of the cake almost resembled carrot cake, but it still went well with the melted chocolate filling and fluffy marshmallow frosting.


Unfortunately, I didn't take any process pictures for this recipe either. I recently got a new camera and it's one of those big fancy ones and, frankly, it just takes too much time for me to set everything up all pretty like. Especially when I have things that are time sensitive. I know, I know, excuses. But everything in this recipe is pretty straightforward. There aren't any steps that are advanced nor things that I haven't done before, just a lot of making sure things don't burn.


So anyway, make these cupcakes and invite your friends over to celebrate National S'mores Day! Or save all the cupcakes for yourself and let your friends enjoy the treat the old fashioned way instead. I won't tell.
The Ingredients (makes 1 dozen):
For the cupcakes:
-1 cup graham cracker crumbs
-1/2 cup flour
-1 1/2 tsp baking powder
-1/2 tsp salt
-1/3 cup butter
-1/4 cup honey
-1/4 cup sugar
-1 tsp vanilla
-2 eggs
-1/3 cup milk
For the filling:
-3/4 cup bittersweet chocolate chips
-1/4 cup heavy cream
For the frosting:
-3 egg whites
-1/2 cup sugar
-torch (optional)


The Directions:
1. Preheat oven to 350 degrees Fahrenheit and line your muffin/cupcake pan.
2. Combine the cracker crumbs, flour, baking powder and salt in a bowl and set aside.
3. Cream the butter, honey and sugar. Mix in the vanilla then add the eggs one at a time.
4. Add 1/3 of the dry mixture to the wet, then 1/2 of the milk, another 1/3 of the dry, etc. until you run out of both. Mix and scrape between each addition!
5. Fill cups and bake for 15-20 minutes, or until a toothpick in the center comes out clean. Rotate pans halfway through baking to ensure even baking. Allow to cool completely before filling and frosting.
6. While cupcakes are cooling, melt the chocolate chips and heavy cream together in a double boiler.
7. Using a paring knife or a melon baller, cut/scoop out the centers of the cupcakes and fill with the chocolate filling.
8. Beat the egg whites and sugar until stiff peaks form.
9. Frost the cupcakes and slightly toast the top. You can use a torch if you have one or you can set the cupcakes under the broiler for a few minutes. If you're using the oven, make sure you watch it!
10. Consume and enjoy!

Friday, July 15, 2011

July's Cupcake Of The Month: Butterbeer

When the Harry Potter series ended, it really felt like my childhood was ending. I mean, c'mon, Harry and I practically grew up together (practically... okay, maybe I'm just being dramatic)! And now the movies are coming to an end too! I'll admit it, though, I don't really love any of the movies. Yeah, there were some good ones, but then there were some really bad ones too (i.e. the sixth movie).


But with all that aside, as soon as I started doing the monthly cupcakes, I knew I had to make special ones for the last movie. And I figured, what would be more Harry Potter-ish than butterbeer cupcakes? Yeah, I could've just made the drink and called it a day, but c'mon, it's me. Cupcakes are always inevitable.


Unfortunately, I haven't gone to Harry Potter World yet, so my friend and I decided to try and make some of our own. We found a recipe here and set out to make this magical concoction. To be honest though, when we first started preparing the drink, it was a little off-putting. So much sugar and cream and butter... it was a little much for a girl who enjoys her bittersweets to take. And what I'm about to say next is probably going to make a lot of Potter fans hate me, but I really did not enjoy the butterbeer. Okay, that's a lie. I enjoyed the first few sips, but after that, the sweetness of the drink just kind of coated my mouth in a very unpleasant way. Now, I'm not saying that I won't ever drink butterbeer again... I mean, when I finally go to Harry Potter world, best believe that I'll be in line for one of their souvenir steins. But until then, I think I can do without.


So for the cupcakes, I tried my best to keep that butterbeer flavor but minus all the extra sweetness. If I made them again, I think I would've added a tsp of butter flavoring to the cake, but other than that, I'm pretty happy with what came out. If you want something a little sweeter, you can always make extra butterscotch sauce and fill the cupcakes with it. 


Anyway, hope you all enjoy the cupcakes!


The Ingredients (makes 2 dozen):
For the cupcakes:
-3 1/2 cups flour
-1 tbsp baking powder
-1/2 tsp salt
-1 cup unsalted butter, room temperature
-1/2 cup sugar
-1/2 cup brown sugar, packed
-2 tbsp vegetable oil
-4 eggs
-1/2 tsp vanilla extract
-1/2 cup milk
-1/2 cup cream soda
For the butterscotch sauce:
-1 cup of butterscotch chips
-1/3 cup heavy cream
For the frosting:
-1 cup unsalted butter, softened
-1 cup vegetable shortening
-1 cup butterscotch sauce, or to taste


The Directions:
1. Preheat your oven to 350 degrees Fahrenheit and line your cupcake pans.
2. In a large bowl, sift together the flour, baking powder and salt. Set aside.
3. In a mixing bowl, beat the butter, sugar and brown sugar until the butter is fluffy and everything is combined.
4. Add the eggs one a time, mixing until each one is just incorporated. Then add the vanilla and oil and mix well. In a separate bowl/cup, combine the cream soda and milk.
5. Add 1/3 of the dry mixture to the wet and mix until just combined. Then add half the cream soda and milk, mixing well, then another 1/3 of the dry, the second half of the soda/milk, and then the remaining flour. Make sure to scrape after each dry addition to ensure that everything gets mixed in.
6. Fill cupcake liners between 1/2 to 2/3 of the way up and bake for about 15 to 17 minutes, or until a toothpick in the center comes out clean. Allow to cool completely.
7. Combine the butterscotch chips and heavy cream in a metal bowl over a pot of simmering water and stir until smooth. Put aside to cool. If you don't feel like making your own butterscotch sauce, you can always grab a jar of it at the grocery store. I won't judge!
8. Whip the butter and shortening together until combined and fluffy.
9. Add the butterscotch sauce, 1/2 cup at a time, beating until well combined. Make sure you scrape the bottom of the bowl or some of the butterscotch will just sink to the bottom. Frost cupcakes.
10. Consume and enjoy!

Thursday, June 30, 2011

June's Cupcake Of The Month: Lemon Meringue


Inspired by the cupcakes one can find in San Francisco's Cako and pushed by my love for all things citrus-y, I decided to finally make some of my own!

Since lemon meringue is one of the very few desserts I actually crave, I have a feeling I'll be making these often. After all, I'd much rather spend a couple hours in the kitchen than I would spending a couple hours driving somewhere just for some cupcakes.

The Ingredients (makes 1 dozen):
For the cupcakes:
-recipe can be found here
For the filling:
-1 egg
-1 yolk
-juice of 1 lemon
-1/2 cup butter
-1/2 cup sugar
For the frosting:
-3 egg whites
-1/2 cup sugar

The Directions:
1. Bake cupcakes as directed by the recipe.
2. Beat the egg and yolk in a metal bowl over a pot of simmering water. Then beat in the juice, butter and sugar. Stir over medium heat until it reaches the consistency of pudding. Set aside and allow to cool (curd will thicken as it sits).
3. Beat the sugar and the egg whites until the sugar is completely dissolved and firm peaks form.
4. Using a paring knife, cut out a small hole at the top of your cupcake and fill with the lemon curd.
5. When you are ready to serve, frost cupcakes with the meringue and
...if you have a torch: lightly torch the top of the meringue.
...if you are torchless: turn on the broiler to medium-high heat and put the cupcakes under the broiler for a minute or two. Do not walk away from it!
6. Consume and enjoy!

Saturday, June 25, 2011

Tiramisu Cupcakes

These cupcakes were baked for a baby shower after I found out the mommy-to-be's favorite cake was tiramisu. I tried to find a way to incorporate the sponge biscuit part of the classic tiramisu but unfortunately, I couldn't figure anything out. But nonetheless, I got a lot of compliments about how much the cupcakes tasted like the cake so I'm still very happy with the outcome. 

Originally, I planned on just doing a simple garnish with cocoa powder but little chocolate E's (for baby Elise) look a lot cuter, no?

And no process pictures this time! My mind was somewhere else while I was baking and I completely forgot about taking pictures. But in the meantime, enjoy the couple of shots I was able to take while at the shower.

The Ingredients (makes 2 dozen):
For the cupcakes:
-recipe can be found here
For the sugar syrup:
-3 tbsp instant coffee or espresso powder
-1/2 cup plus 1 tbsp sugar
-1 1/2 cup water
-1/4 cup plus 2 tbsp dark rum or amaretto (optional)
For the frosting:
-2 cups heavy cream
-1 lb mascarpone cheese, softened
-1 cup powdered sugar, or to taste, sifted
-unsweetened cocoa powder or other garnish (optional)

The Directions:
1. Bake cupcakes as directed.
2. Dissolve the coffee powder and sugar into the water in a small saucepan and bring it to a boil. Remove from heat and stir in the alcohol. Set aside to cool. 
3. Once cupcakes have cooled, use a fork to pierce the tops.Then brush a generous amount of the syrup over the top, but no more than 2 tbsp per cupcake. The cupcakes will need at least 30 minutes to fully absorb the syrup.
4. Whip the mascarpone, heavy cream and sugar together until everything is smooth and combined.
Tip: If you are planning on dusting with cocoa powder, do not do so until maybe half an hour before serving or the powder might dissolve into your frosting.
6. Consume and enjoy!